
Before you start
You need an Apple silicon Mac running macOS 13 Ventura or later, Jotfin, and a few minutes to set up your audio. Download Jotfin for Mac, open the disk image, drag Jotfin to Applications, and launch it from there.
Download a speech model during setup, then start your free trial in the app. No card is required. The current soft launch offers a free trial; paid subscriptions will open later.
Internet access is needed for model downloads, trial activation, and periodic access verification. Once the model is downloaded, recording and transcription run on your Mac. This guide does not use cloud AI summaries.
For a simple practice recording, choose Microphone only and read: “Alex will send the revised homepage by Friday. Jamie will review the copy before Monday’s check-in.” Before recording other people, make sure they know and agree to being recorded.
1. Choose the audio you want to capture
Open Settings → Audio source. Choose the source that matches your task:
| Audio source | What it captures |
|---|---|
| Microphone only | Your voice through the system’s selected microphone. |
| System audio | Audio playing on your Mac. Your microphone is excluded. |
| Automatic or Microphone + system audio | Your selected microphone together with computer audio. |
Allow Microphone access for microphone capture and Screen Recording or Screen & System Audio Recording access for computer audio when macOS requests them. Permission names vary by macOS version. If access is blocked, check System Settings → Privacy & Security and reopen Jotfin if macOS asks.
Check the source label below Record meeting, then make a short test. For a call, confirm both your voice and the other side appear in the saved transcript before relying on the setup. Hardware and meeting-service compatibility testing is ongoing.
2. Record and add your own notes
Select Record meeting. Speak naturally, or start the conversation you have agreed to record. Watch the audio level indicator and check the live captions as a quick indication that speech is being captured.
Use Your notes for details you want to remember: a decision, a question, or a follow-up. Notes save automatically on this Mac. When you are finished, select Stop recording and let local transcription finish.
Live captions are provisional. Use the completed transcript for your review.
3. Review the completed transcript
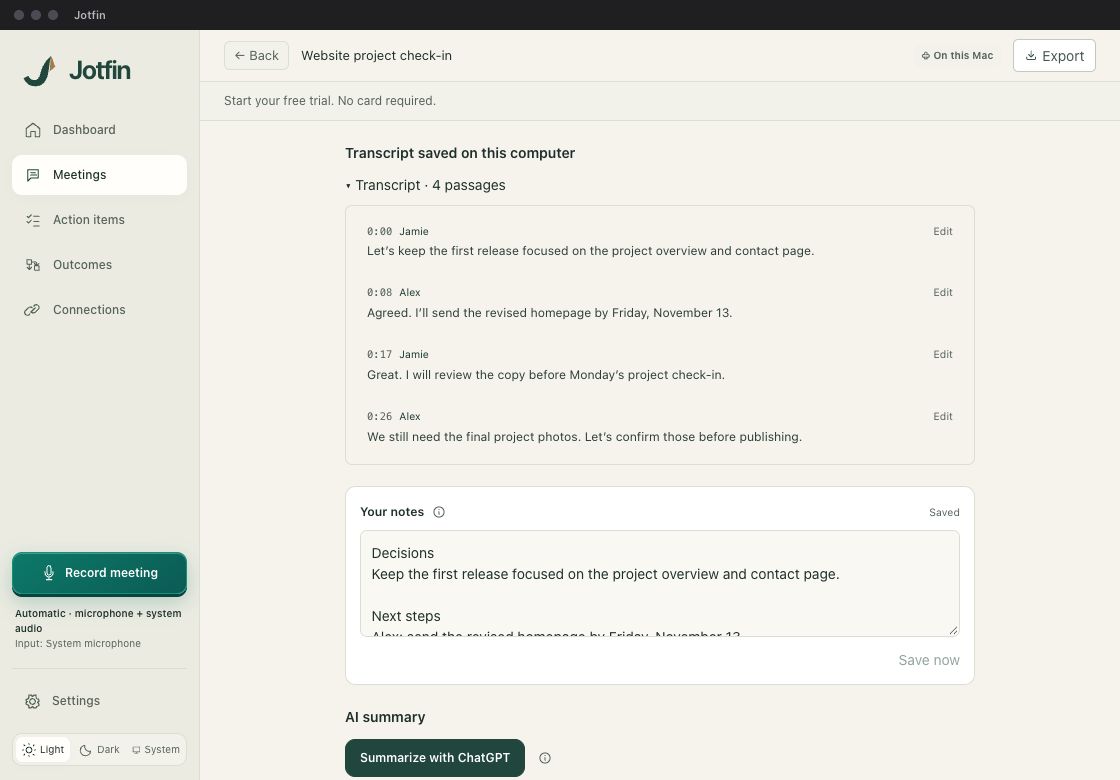
Open the meeting from Meetings. If necessary, expand Transcript to see the timestamped passages. Read through the important names, numbers, and commitments. Select Edit next to a passage to correct it.
Speaker labels are estimates. Select a speaker label to name that speaker within this meeting after checking who actually said the words.
4. Find the decision or deadline again
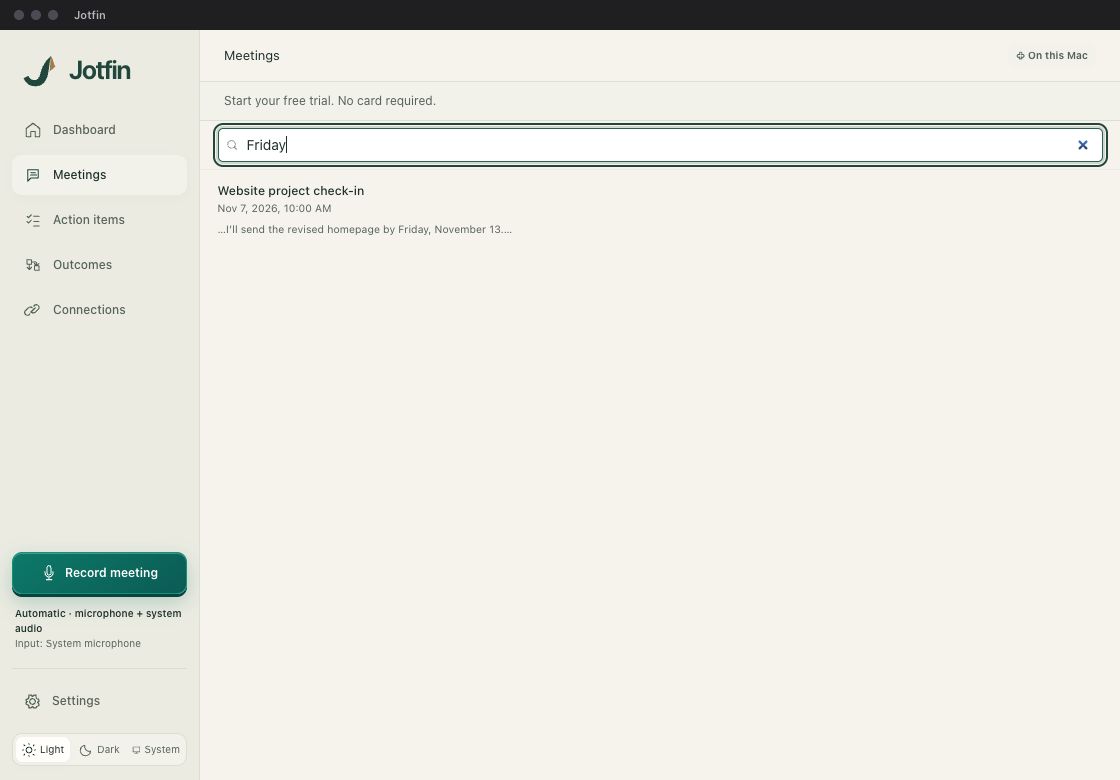
Return to Meetings and use Search meetings. Try a distinctive word from the conversation, such as Friday, a project name, or a deliverable. Jotfin searches meeting titles, your notes, transcripts, and saved summaries.
Open the matching meeting and check the original passage. In our example, Alex committed to sending the revised homepage by Friday, November 13. Put the owner and date into your notes so the next step is easy to find.
5. Export to Markdown or an Obsidian vault
Open the meeting and select Export in the top right.
- Markdown (.md): choose a location and save the file. Open it in your preferred Markdown editor, or put it in an Obsidian vault.
- Plain Text (.txt): save a text copy for an editor or another notes app.
- Obsidian Vault (.md): send the note directly to the vault folder you configured in Jotfin.
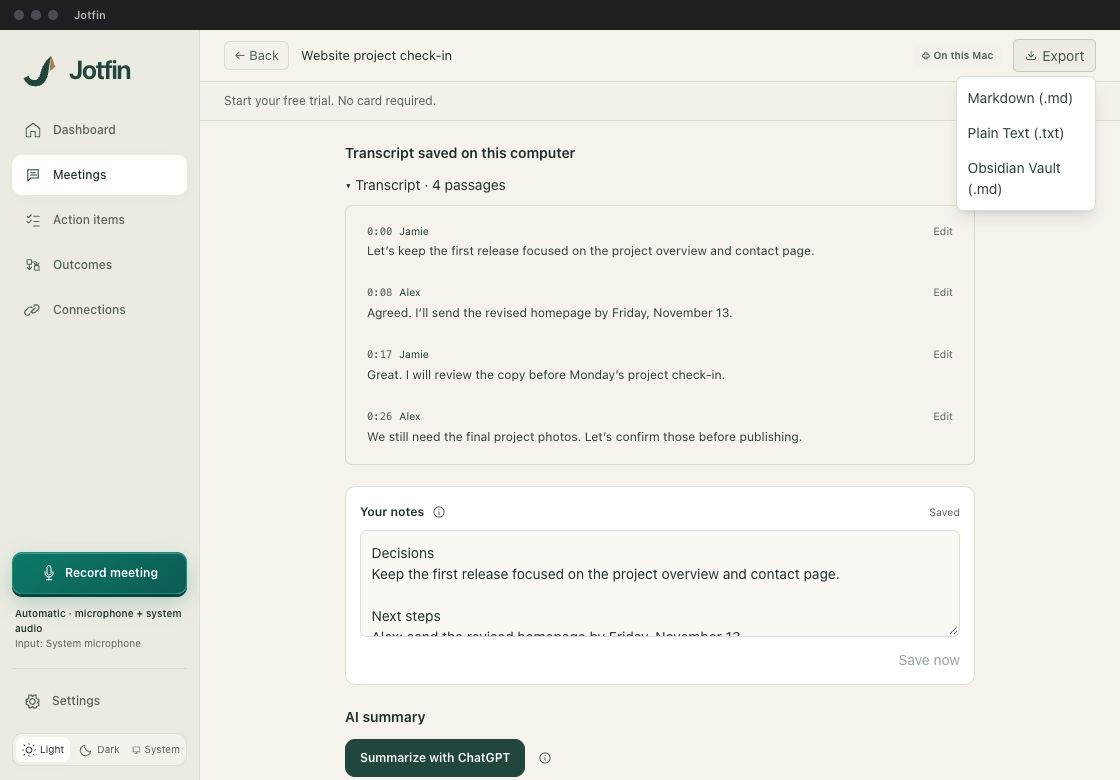
For direct Obsidian export, first open Settings → Advanced settings → Obsidian, select Choose Folder beside Vault Path, and choose the root folder of your existing vault. Check the meeting-notes folder; the default is Meetings. Close Settings, return to the meeting, and choose Export → Obsidian Vault (.md). Obsidian does not need to be running.
Exports include your notes and the timestamped transcript, plus any saved summary and action items. An AI summary is optional. Check the exported file before sharing it: the full transcript can contain more detail than you intend to send. If your destination folder syncs to a cloud service, that service’s settings apply to the exported file.
Keep the next step clear
Use a short structure for every meeting: decisions, action items with owners and dates, and questions still open. Our free Markdown template works in Obsidian and other Markdown editors, with or without Jotfin.
FREE DOWNLOAD · NO EMAIL REQUIRED
A place for every decision.
Start with the blank template, or see how the fictional meeting in this guide becomes a useful project note.
Preview the template and usage notes →A few useful answers
Do I need ChatGPT, Claude, or an API key?
No. Recording, local transcription, personal notes, search, and exports do not require an AI account. If you choose an optional cloud summary, meeting text is sent to your selected provider and separate provider charges may apply.
Does a bot join the call?
No. Jotfin records audio sources on your Mac. It does not join meeting accounts or read meeting chats.
What happens when my trial ends?
You can still read, edit, and export saved meetings. Starting a new recording requires active recording access; a recording already in progress is not stopped by expiry.
YOUR NEXT MEETING
Keep the conversation.
Take the useful parts with you.
Download Jotfin for Mac Apple silicon · macOS 13 or later · Start your free trial, no card required